3D Rendering
Coming from the previous chapter, two changes have been made, instead of a single triangle, we've added a list of vertices and indices in order to create a cube mesh, and to make things more clear, we're relying on colors instead of a texture for now.
Without any other changes to our main code, our cube will show up in 3D just as it did with our triangle, quite easy huh!
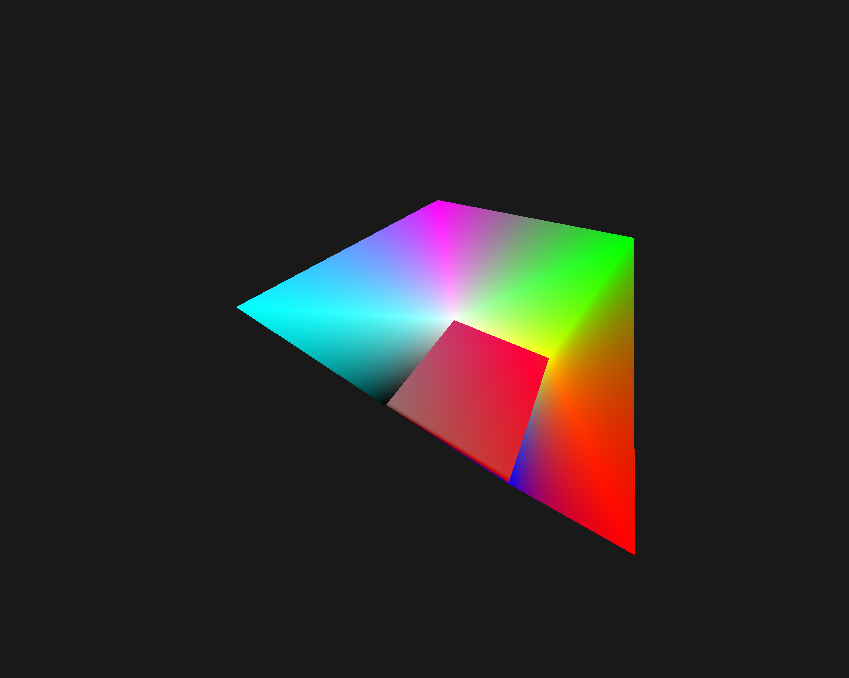
But something seems wrong, our triangle didn't look so weird, why are we looking inside the cube and seeing the other side sometimes?
Well, we're still missing one critical part in order to get 3D rendering to work properly.
The Depth Buffer
In order to fix our weird looking cube we'll need a depth buffer, this is a special kind of render target that keeps track of the "depth" of each fragment on the screen, basically saying "how far away is this pixel on the screen". This depth buffer can then be used by special hardware on the GPU to see if the fragment we're working on is behind or in front of the previous fragment.
This is called "Depth Testing", a very important concept within common rendering.
So let's create our depth buffer which in D3D11 are called a DepthStencil and the handle for it being a DepthStencilView (a "DSV" as we'll call em from here on)
In CreateDepthStencilView() we have the following code:
D3D11_TEXTURE2D_DESC texDesc{};
texDesc.Height = GetWindowHeight();
texDesc.Width = GetWindowWidth();
texDesc.ArraySize = 1;
texDesc.SampleDesc.Count = 1;
texDesc.MipLevels = 1;
texDesc.BindFlags = D3D11_BIND_DEPTH_STENCIL;
texDesc.Format = DXGI_FORMAT_R32_TYPELESS;

ID3D11Texture2D* texture = nullptr;
if (FAILED(_device->CreateTexture2D(&texDesc, nullptr, &texture)))
{
    std::cout << "DXGI: Failed to create texture for DepthStencilView\n";
    return;
}

D3D11_DEPTH_STENCIL_VIEW_DESC dsvDesc{};
dsvDesc.Format = DXGI_FORMAT_D32_FLOAT;
dsvDesc.ViewDimension = D3D11_DSV_DIMENSION_TEXTURE2D;
if(FAILED(_device->CreateDepthStencilView(texture, &dsvDesc, &_depthTarget)))
{
    std::cout << "DXGI: Failed to create DepthStencilView\n";
    texture->Release();
    return;
}

texture->Release();
Most of the setup for the DSV is very much the same as creating a texture, the only difference being the BindFlags and the Format.
BindFlags needs to be D3D11_BIND_DEPTH_STENCIL in order to let D3D11 know that we're going to bind it as a DSV,
the only curious thing here is DXGI_FORMAT_R32_TYPELESS because the internal format for depth (even though we view it as a FLOAT) is not really a raw buffer full of floats,
but a special format that can differ between GPUs, thankfully we don't need to be concerned with that and all we need to tell it is that it's "typeless".
Lastly in the dsvDesc we actually have two commonly usable choices:
- DXGI_FORMAT_D32_FLOAT (with
DXGI_FORMAT_R32_TYPELESSon the texture) - DXGI_FORMAT_D24_UNORM_S8_UINT (with
DXGI_FORMAT_R24G8_TYPELESSon the texture)
The latter one will also reserve room for something called a "Stencil", which can be used for rendering techniques, we'll explain that one in a later chapter.
One important thing we need to mention is that the DSV always needs to match in resolution with the bound RenderTargetView, so in our case we need to also make sure to resize it if we resize the window. However because there is no functionality to "resize" a DSV, the solution is to clean up our current one and create a new one with the matching resolution.
In order to use this newly created DSV we need to set it using the last parameter in ID3D11DeviceContext::OMSetRenderTargets()
_deviceContext->OMSetRenderTargets(1, _renderTarget.GetAddressOf(), _depthTarget.Get());
Just as with our rendertarget we also need to make sure to clear it every frame (using ID3D11DeviceContext::ClearDepthStencilView())
_deviceContext->ClearDepthStencilView(_depthTarget.Get(), D3D11_CLEAR_FLAG::D3D11_CLEAR_DEPTH, 1.0f, 0);
Note that this takes a D3D11_CLEAR_FLAG and two more arguments, the D3D11_CLEAR_FLAG allows us to clear Depth and Stencil seperately or both at once by OR-ing them together.
The final two arguments are the values to clear the DSV to, first the depth value and lastly the stencil value.
The Depth State
In order to actually use the DSV we just created we need to set up a DepthStencilState, the code for this is pretty simple, in CreateDepthState() we have the following:
D3D11_DEPTH_STENCIL_DESC depthDesc{};
depthDesc.DepthEnable = TRUE;
depthDesc.DepthFunc = D3D11_COMPARISON_FUNC::D3D11_COMPARISON_LESS;
depthDesc.DepthWriteMask = D3D11_DEPTH_WRITE_MASK_ALL;

_device->CreateDepthStencilState(&depthDesc, &_depthState);
DepthEnable is exactly what it sounds like, it "enables" the usage of the DSV.
DepthFunc is what allows us to get Depth Testing, D3D11_COMPARISON_LESS tells it to only draw fragments that have a depth "lesser" than the current value (things that are in front of the current fragment)
DepthWriteMask is what allows us to specify whether we should write to the DSV or not, we can only specify ALL or ZERO (which disables writing).
Finally all we need to do is set it by calling ID3D11DeviceContext::OMSetDepthStencilState()
_deviceContext->OMSetDepthStencilState(_depthState.Get(), 0);
And.. That's it! Running the application now will cause the cube to show up all proper-like!
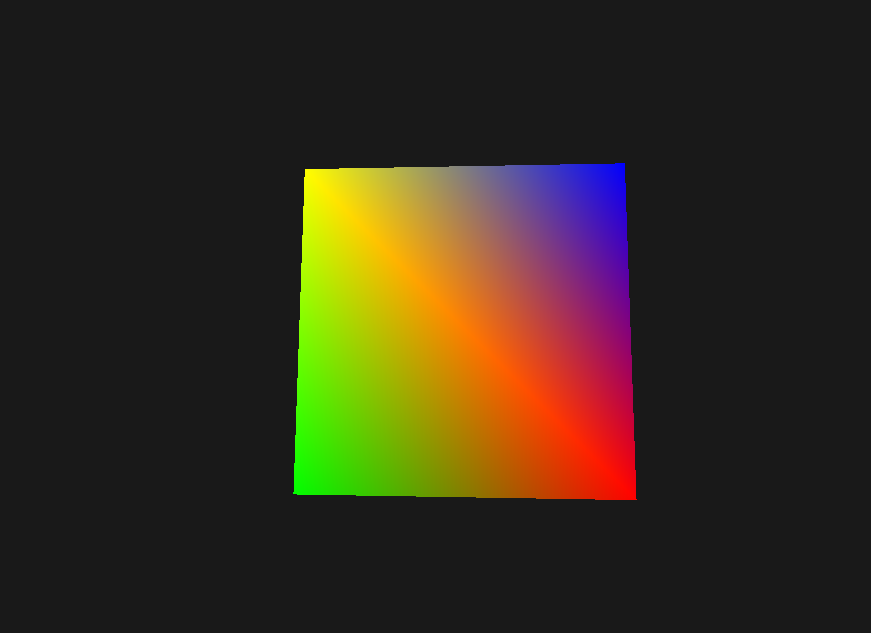
This is because it now uses depth to make sure whether the fragment we're drawing is actually in front of older ones, so we're no longer reliant on the order of the vertices we're drawing, which if we would, would make 3D rendering a 'lot' harder as we'd need to sort all polygons in depth every frame we move the camera around.
From here on out you should be able to create your own renderer using all the knowledge you have received so far, as an extra the next chapters will show you how to load models and get some very nice debugging UI going!